
This integration user guide will help you quickly and easily send candidates a HighMatch assessment invitation and receive those results in Dayforce.
Summary of the Integration Flow
- The integration is either triggered automatically during the application process or triggered manually by a recruiter or hiring manager.
- The candidate will either complete the assessment inline as part of the application process or from the email they receive that was manually ordered.
- HighMatch will update the assessment status within Dayforce when the assessment is sent as well as when it is completed.
- When the candidate has completed the assessment, HighMatch will post the report to Dayforce on the candidate’s profile.
- If the assessment fails to send, HighMatch will post an error response to Dayforce. If you’re not able to determine the cause of the error, it is recommended that you log a support ticket with Dayforce and the HighMatch Support team at support@highmatch.com.
Process Details
Step 1: Assign an Assessment and Delivery Method to a Job Requisition
Select an existing job requisition from your job list in the Recruiting tab (see the note below for more) or create a new job requisition. To create and assign assessments to a new job requisition start by:
- Go to Recruiting > Job Requisitions.
- Create a new job requisition by clicking on the + New button.
- The first step in the job requisition creation process is called General. Here you will need to provide at least the job title, request date, location, status, and hiring manager (required fields). While on this step, click the Assessment dropdown menu and select the assessment you’d like to use for this job requisition.
- When you select an assessment, you will also need to select the delivery method.
- The available Delivery Methods are as follows:
- Embedded in Application – Selecting this option will add an extra step in the job application which the candidate will have to complete when applying for the job. The final step of the application process will redirect the candidate to the HighMatch candidate link to complete the assessment.
- Post-Application Email – Automatic – When the candidate completes the job application, this option will automatically send an email to the candidate using the default email template with the assessment start link.
- Post-Application Email – Manual – This option means that the user will select a candidate on the candidate grid and choose the option Send Assessment under the Screening dropdown to send an assessment email to candidates. This will open a screen where the user will have the ability to update the email sent to the candidate.
- The available Delivery Methods are as follows:
- Once the assessment and delivery method are selected, continue following the on-screen prompts and click Finish once done.
Note: Once the new Job Requisition is saved with the selected Assessment and Delivery Method, it cannot be changed unless the user has the proper permissions.
If you would like users to be able to edit an existing job requisition’s Assessment and Delivery Method, ensure that the roles for those users have the appropriate authorization:
- Go to System Admin > Roles SL.
- Choose the User’s role.
- Select the Authorizations tab.
- On Recruiting: Additional Job Requisition Assessment, ensure “Can Update” is selected.
Step 2: Manually Send Assessments
This step is optional unless the Post-Application Email – Manual delivery method was configured when enabling the integration. Otherwise, assessments are automatically sent either during the application process or after a candidate submits an application depending on the delivery method that was selected.
If you do not want to learn about manually sending assessments, move on to Step 3 in this document.
The Post-Application Email – Manual process can be initiated under Candidate Management or Job Requisition:
For Candidate Management:
- Go to Recruiting > Candidate Management.
- Select the candidate’s record > Screen Candidate.
- Send Assessment.
For Job Requisition:
- Go to Recruiting > Job Requisitions.
- Select the Job Requisition record.
- Check the box beside the candidate’s record > Screen.
- Send Assessment.
Step 3: Reviewing the Assessment Results and Report
To see the Assessment Status and Assessment Score listed for each candidate for a specific job, follow the steps below to ensure these two column fields are visible:
- Go to Recruiting > Job Requisitions.
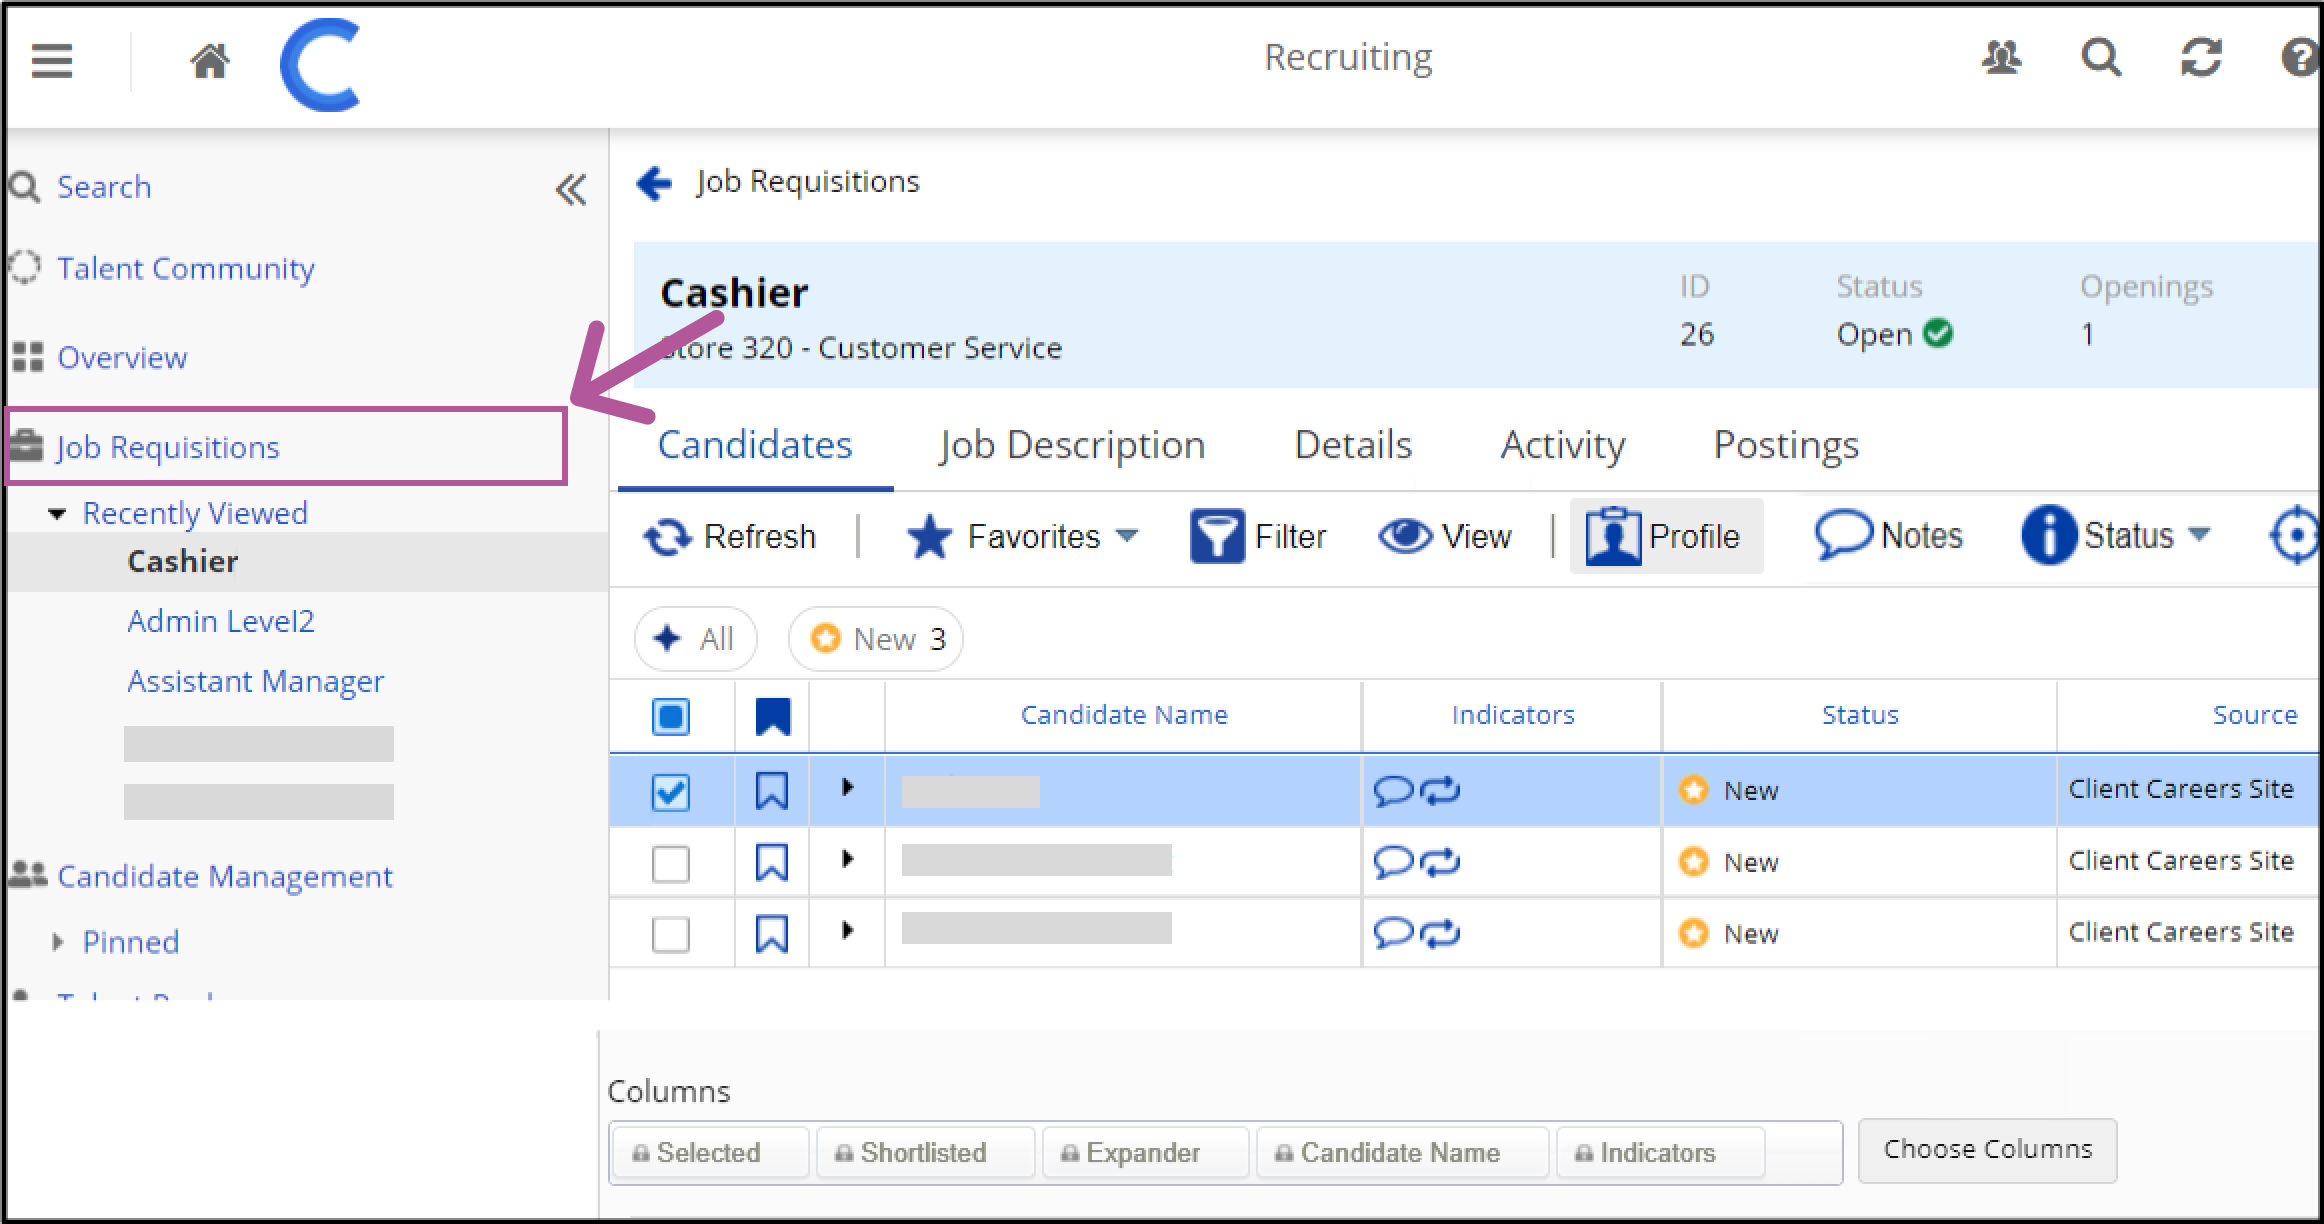
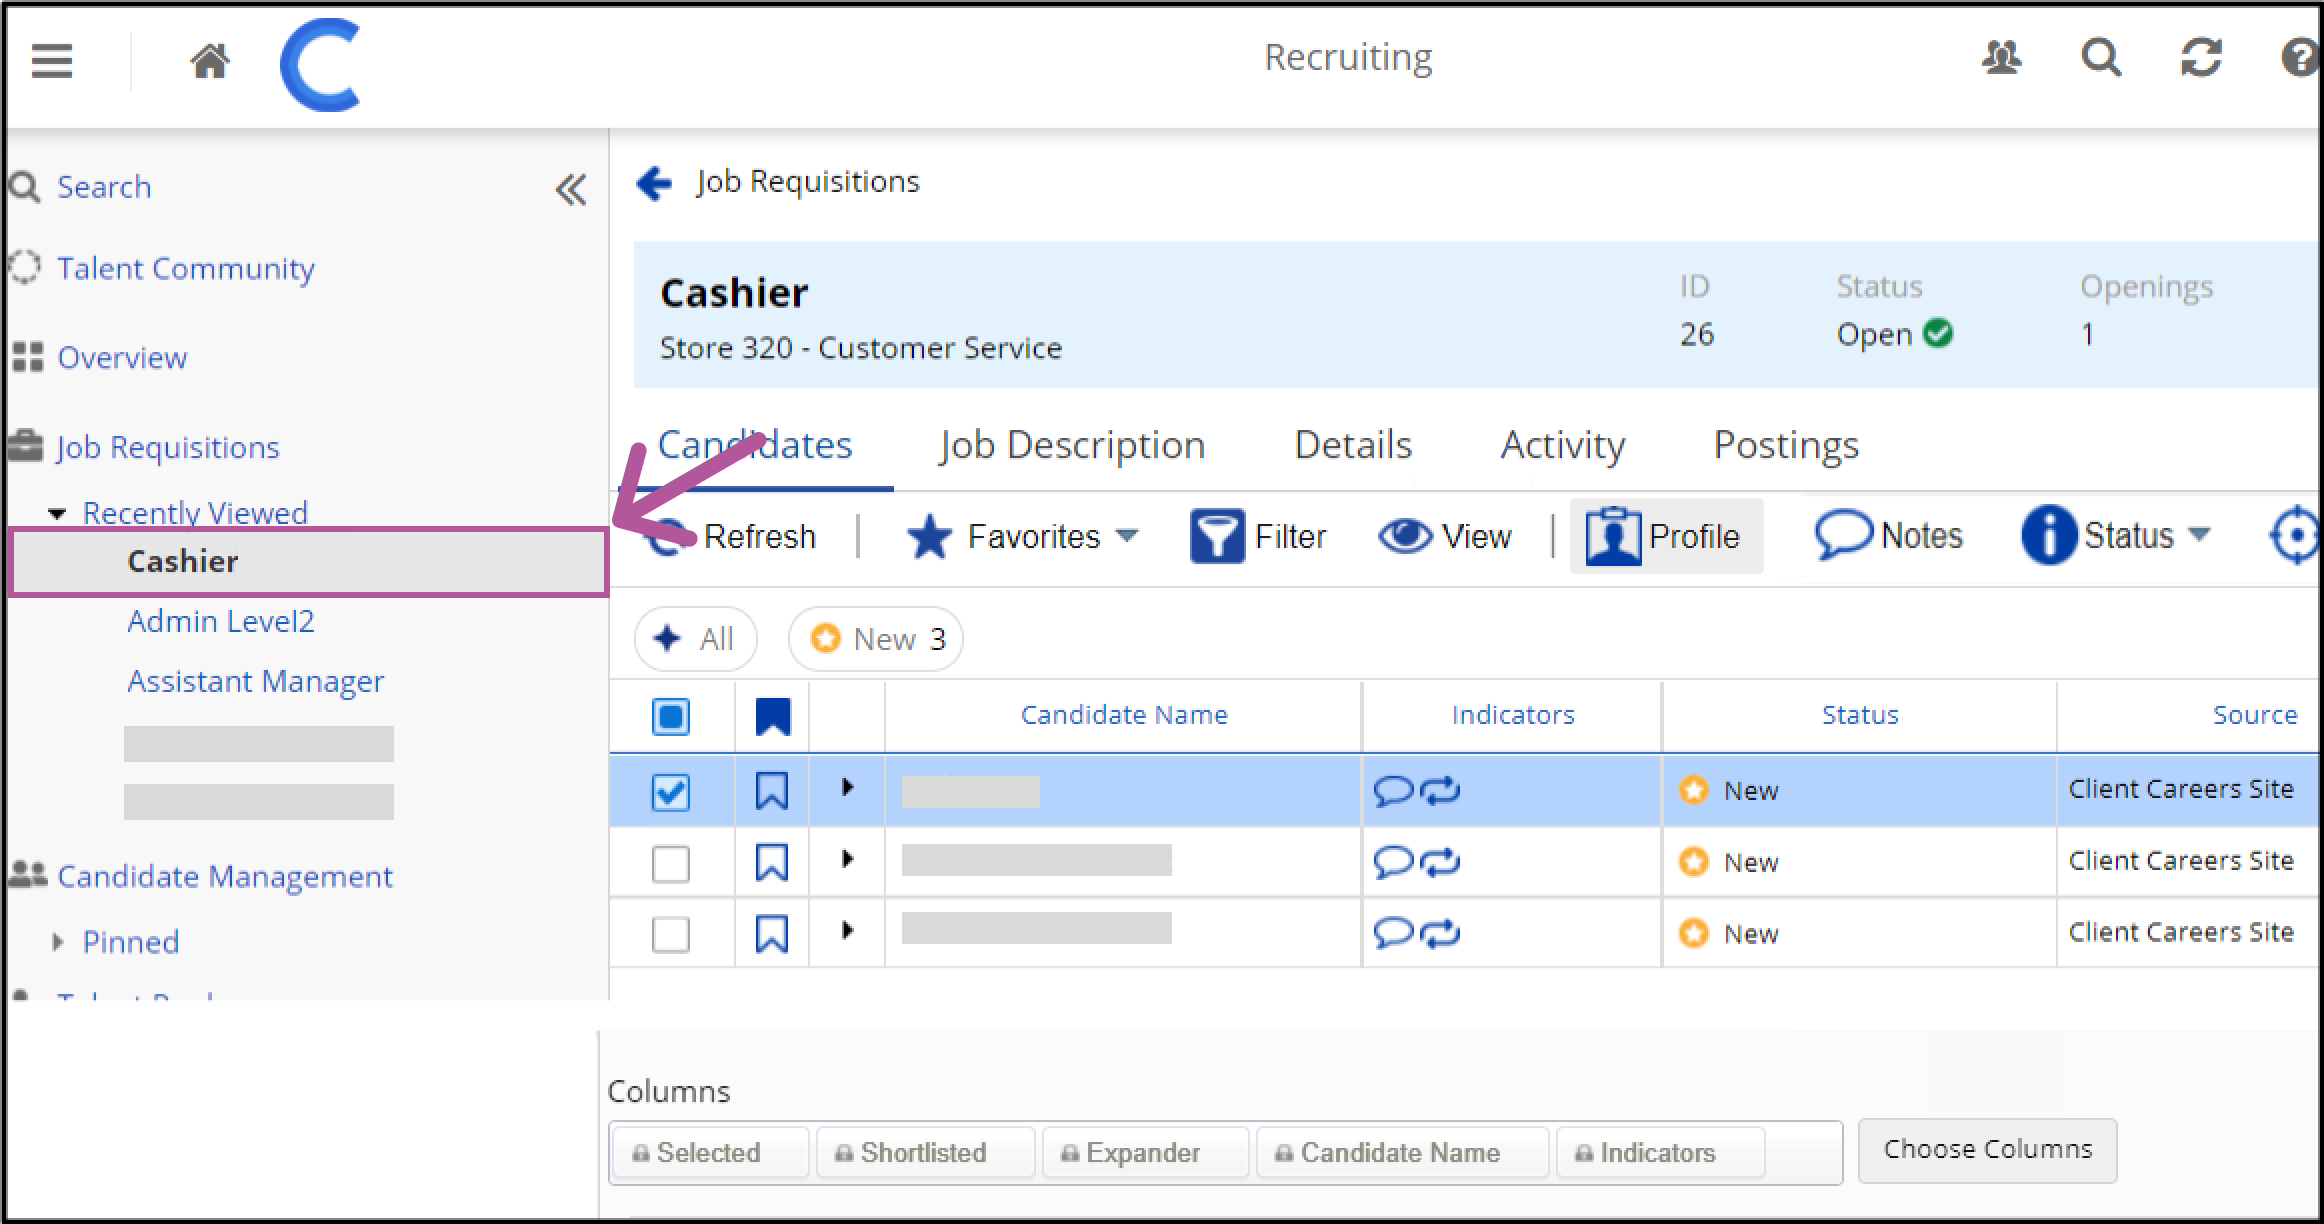
- Click on the specific Job Requisition you want to view.
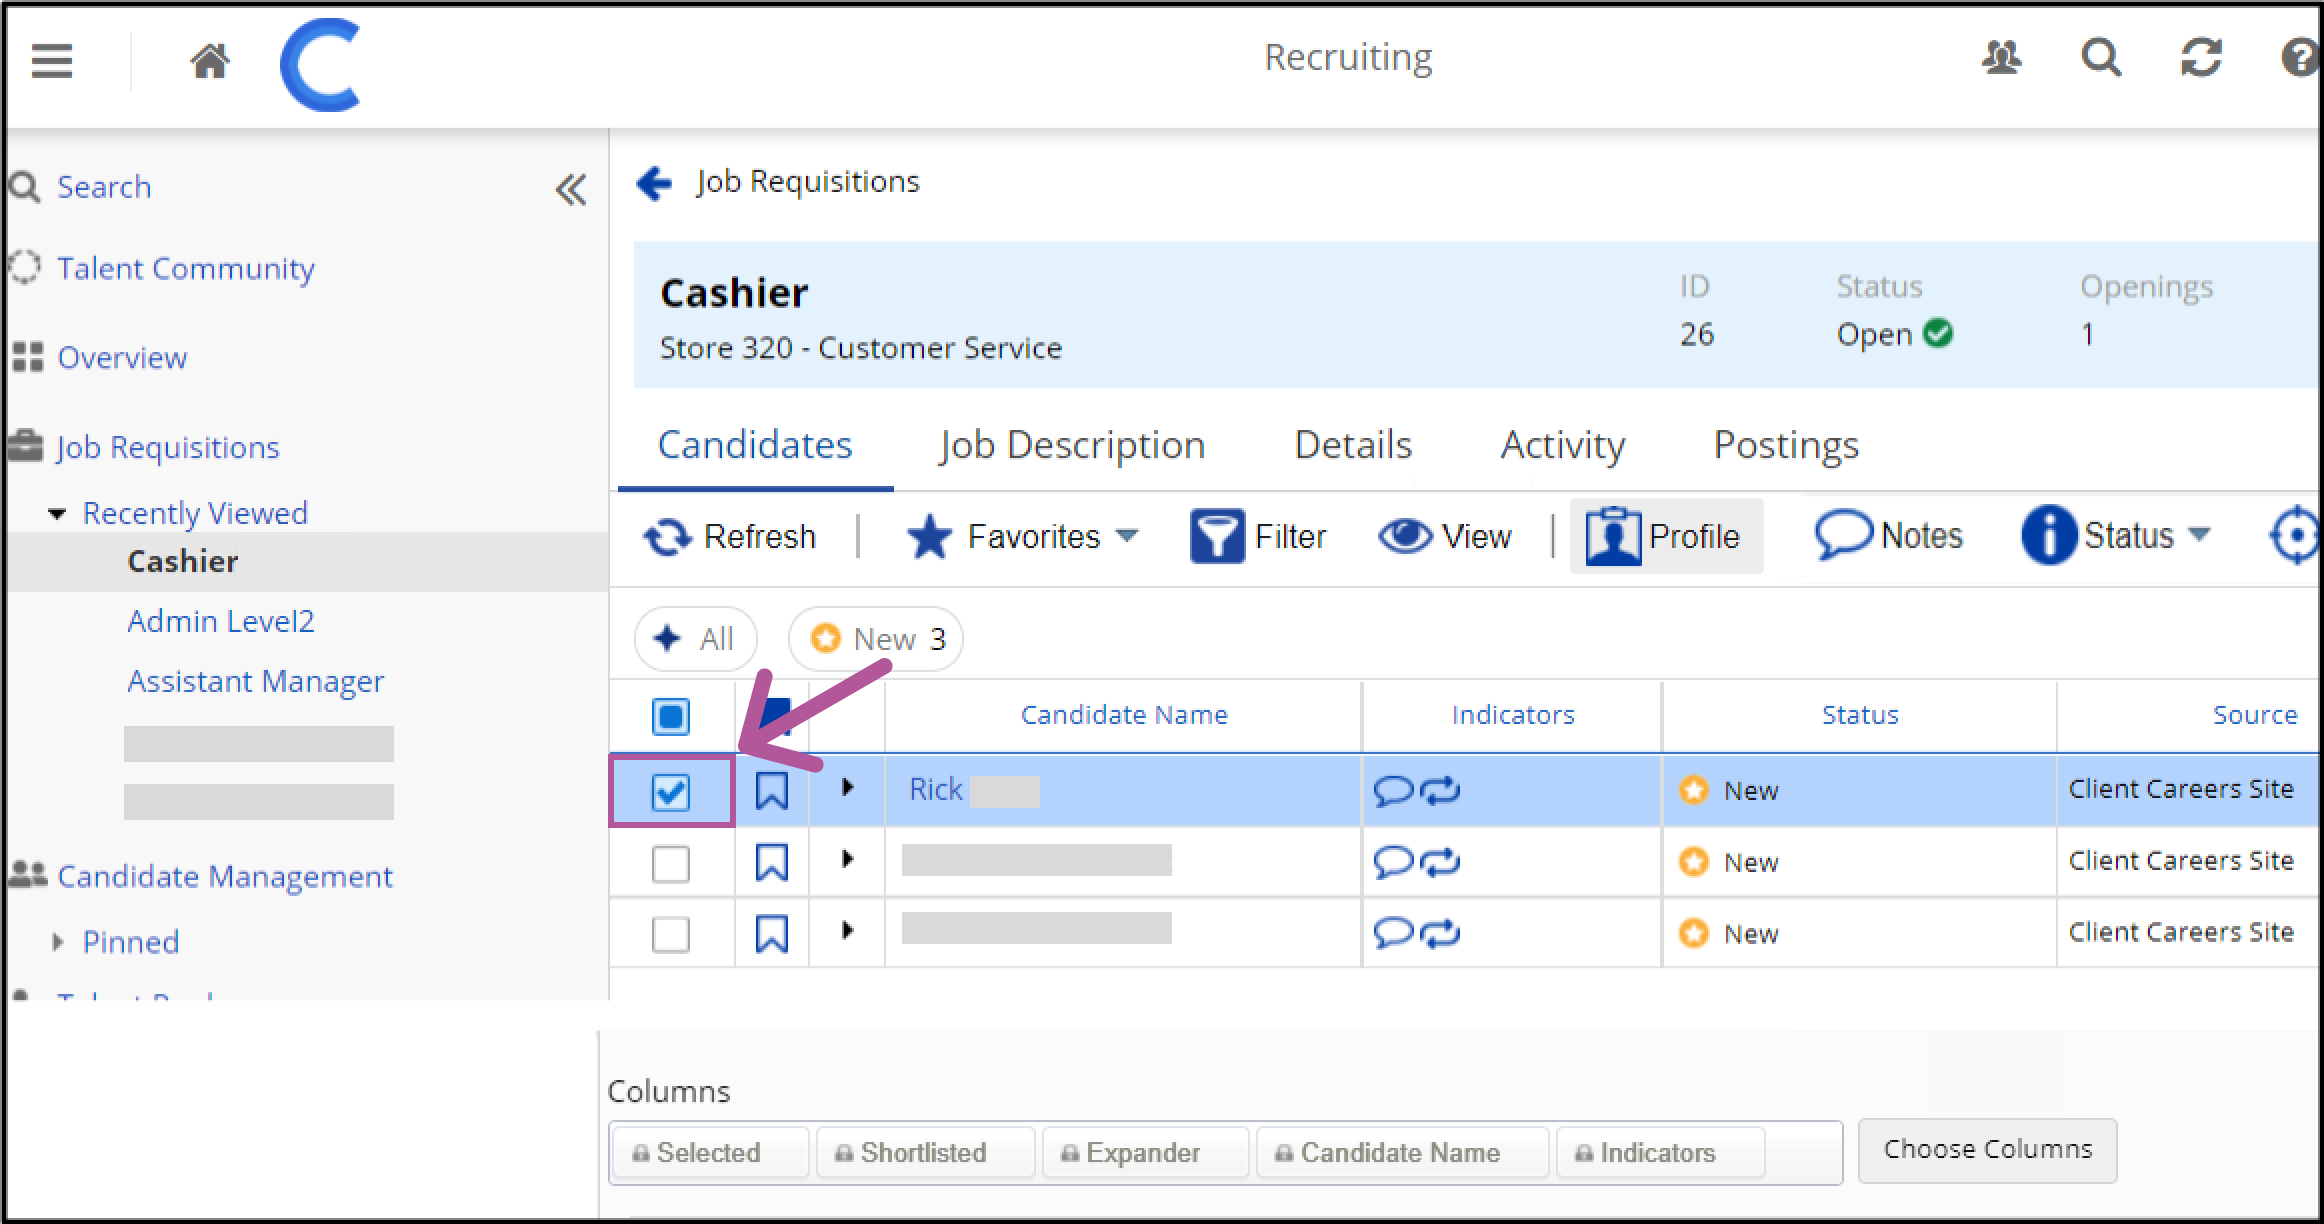
- Click on the specific Candidate you want to view.
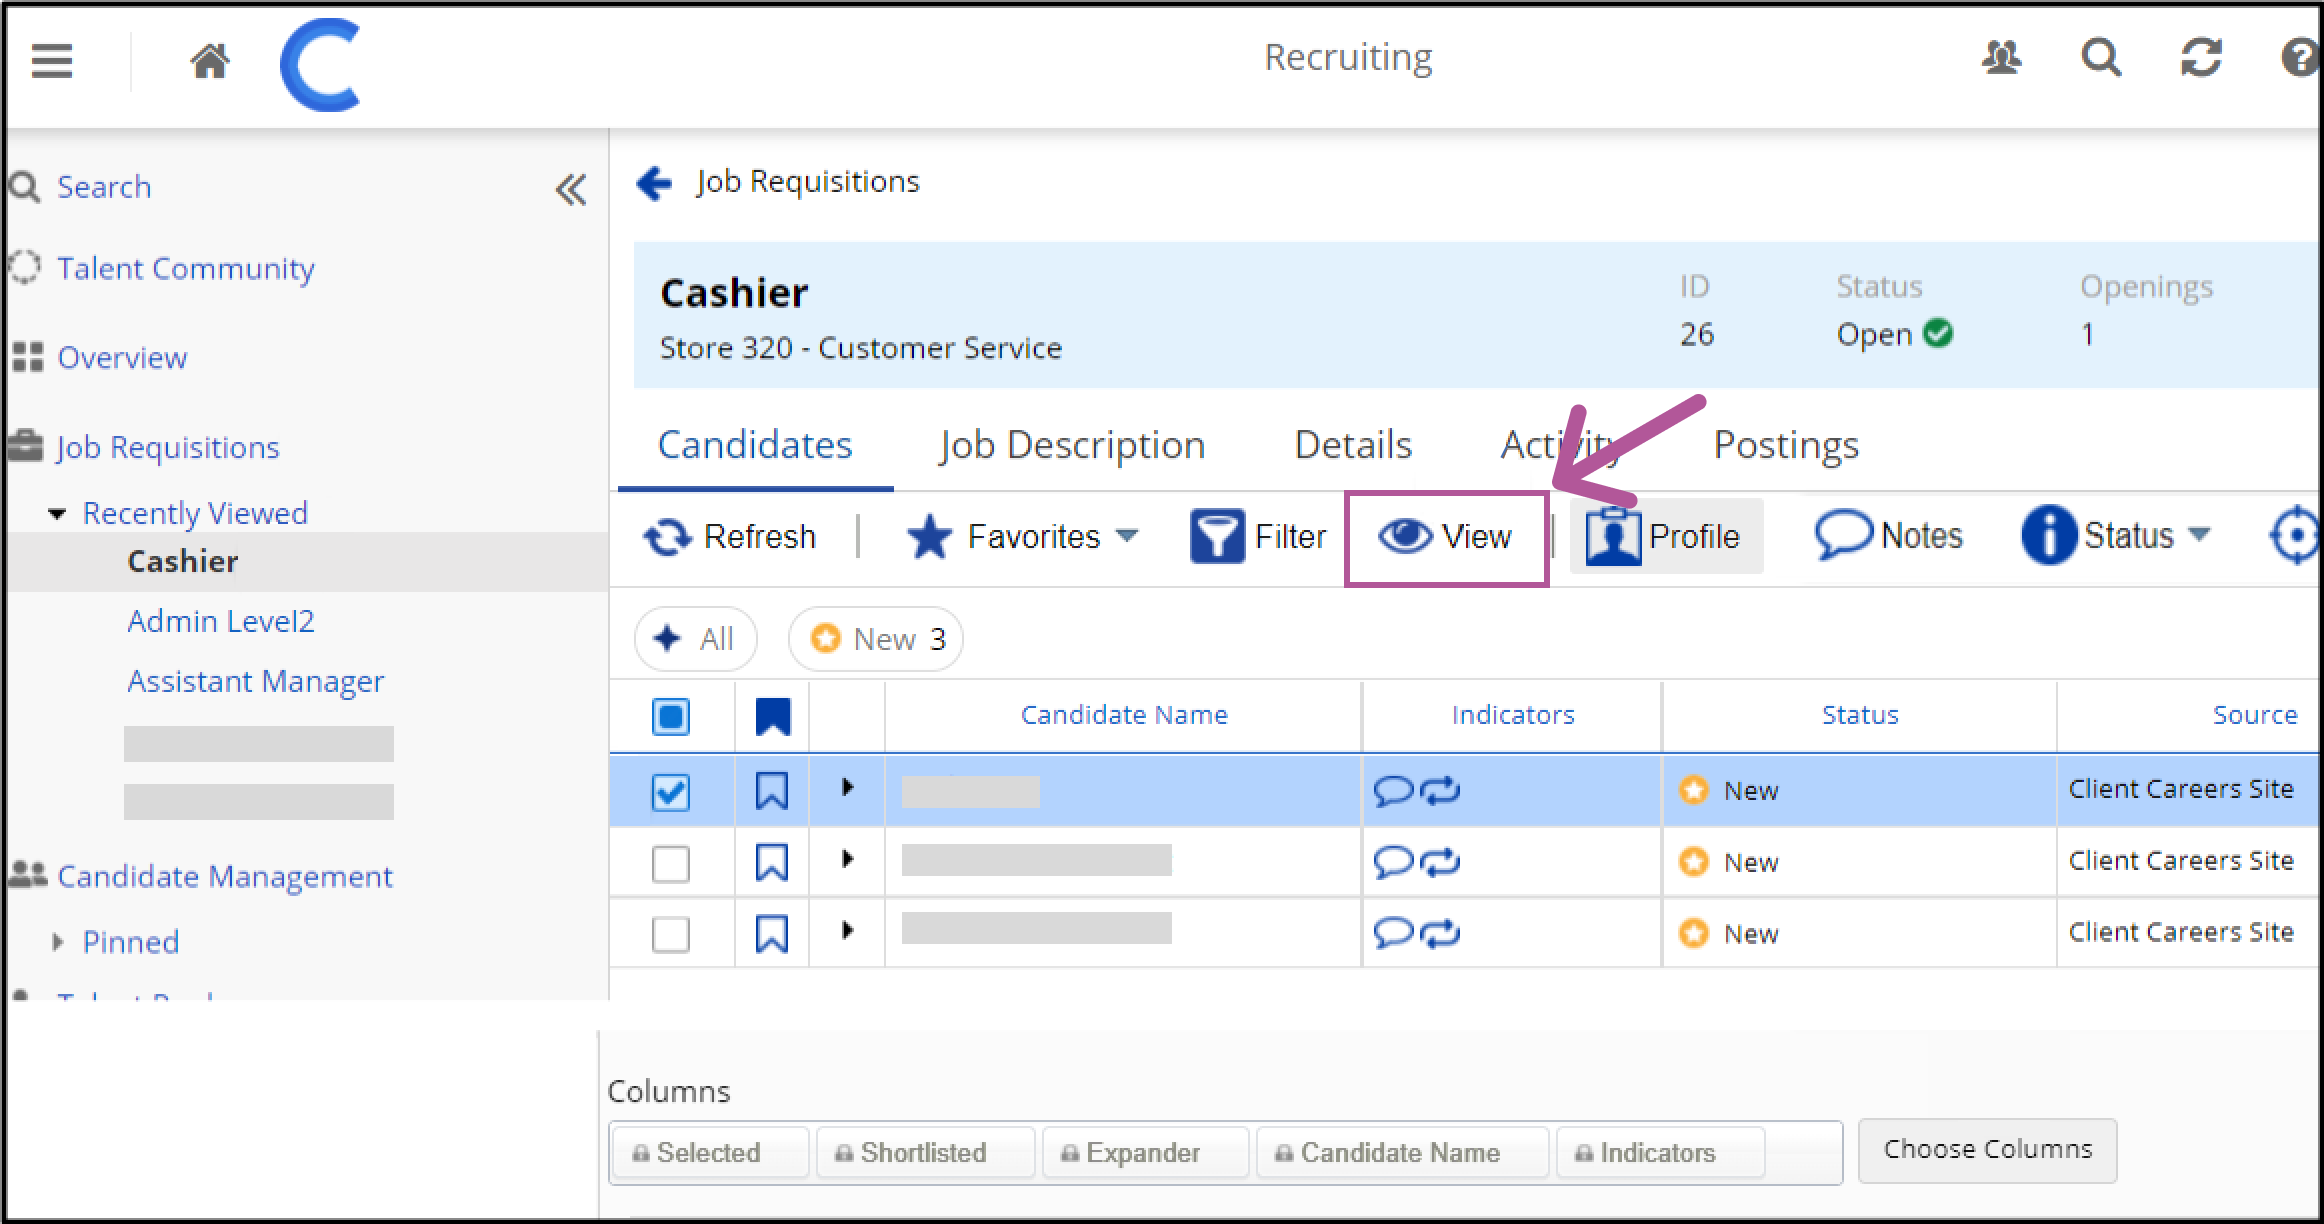
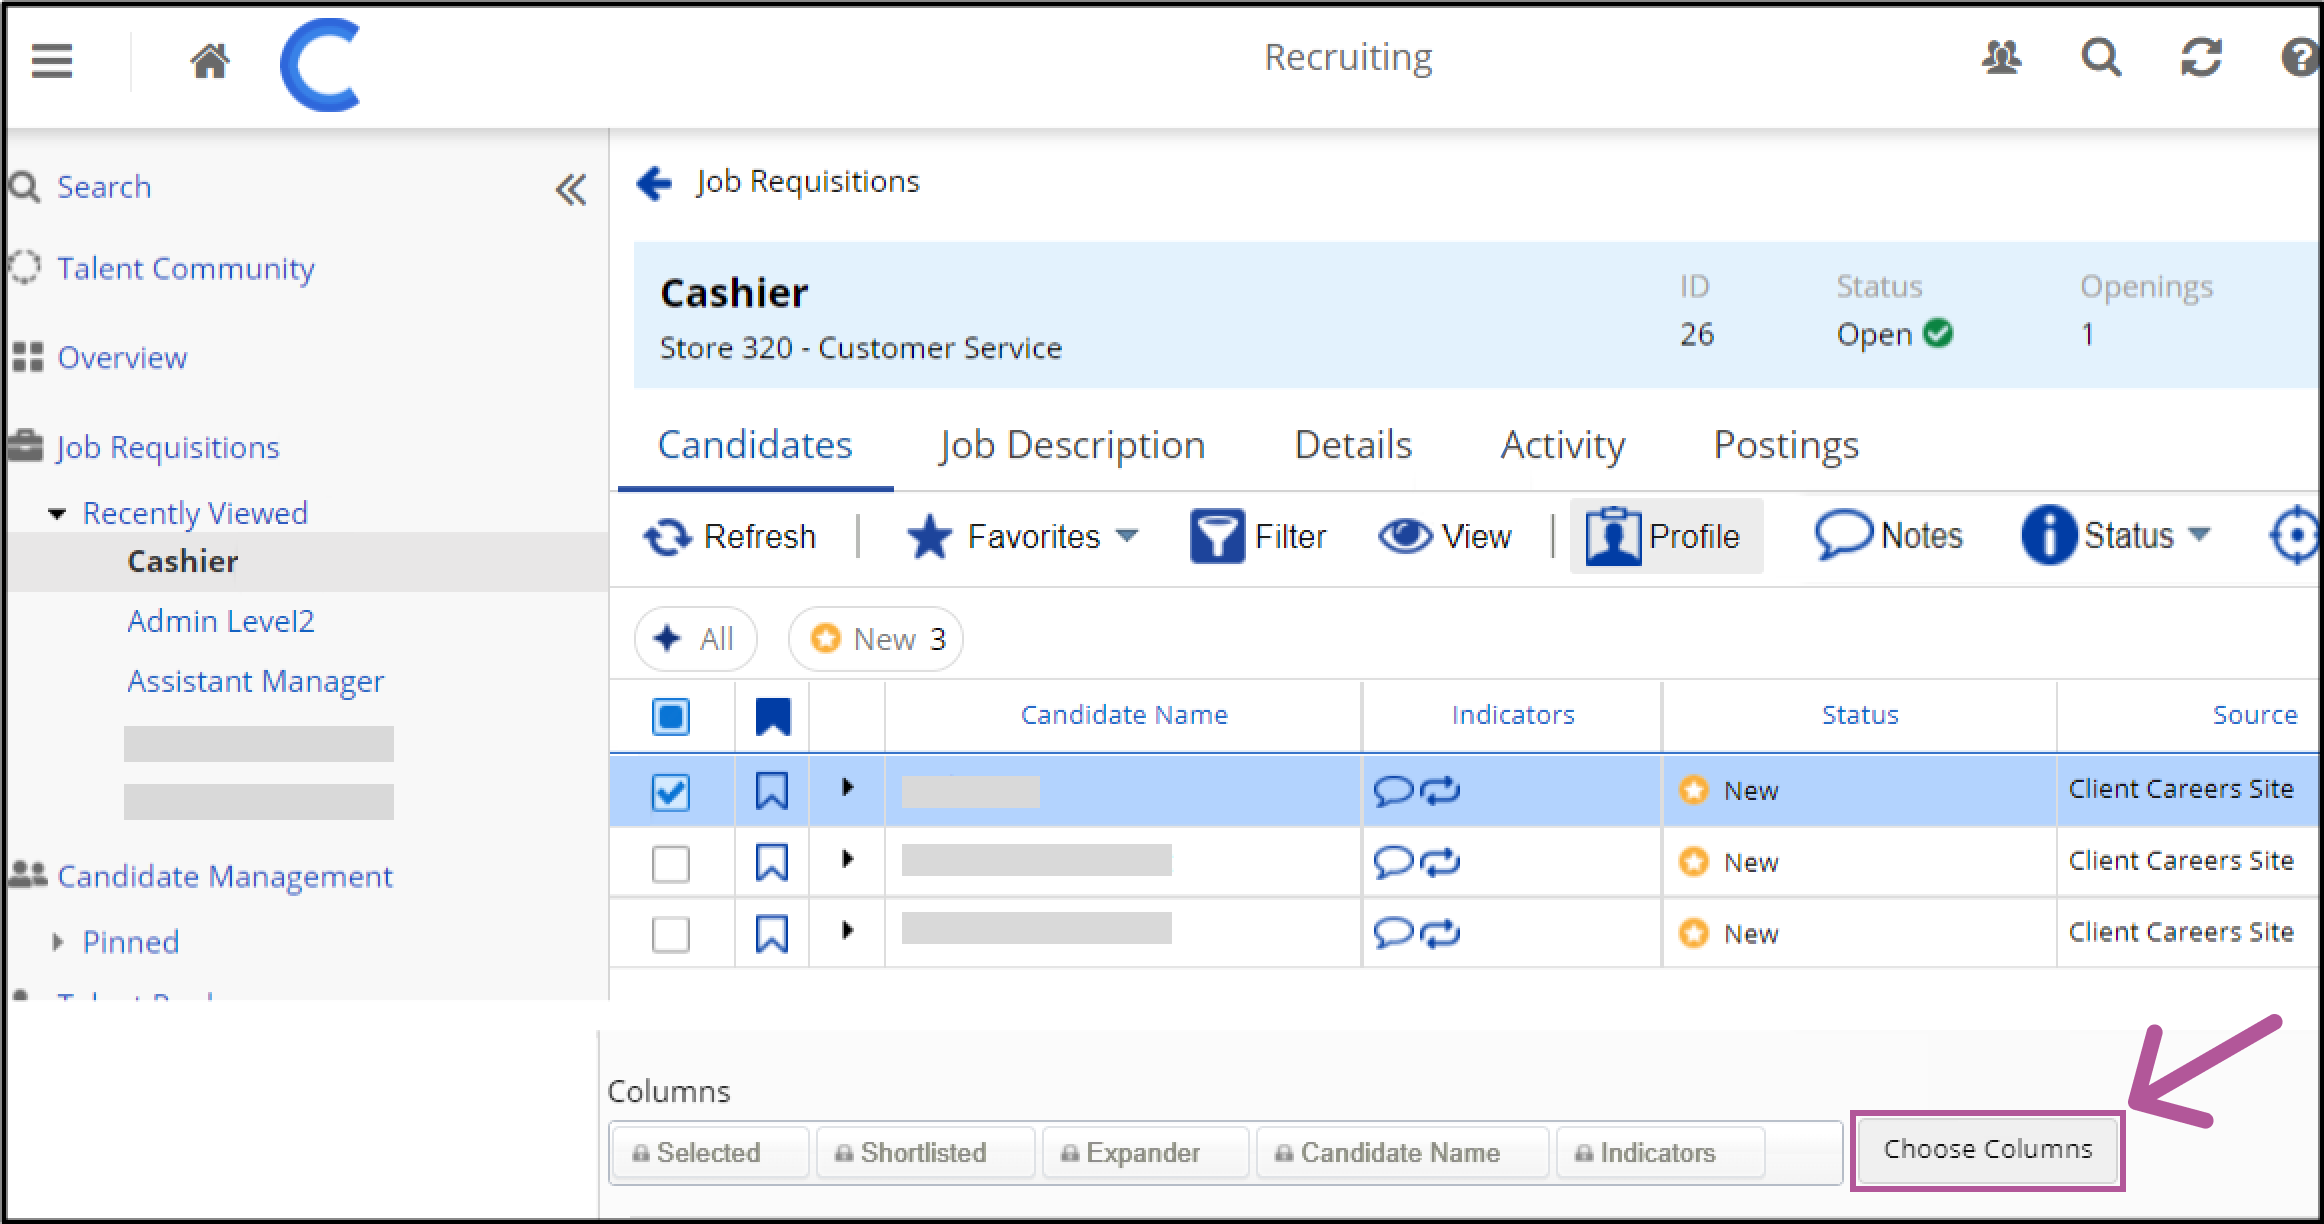
- Click View.
- Click Choose Columns.
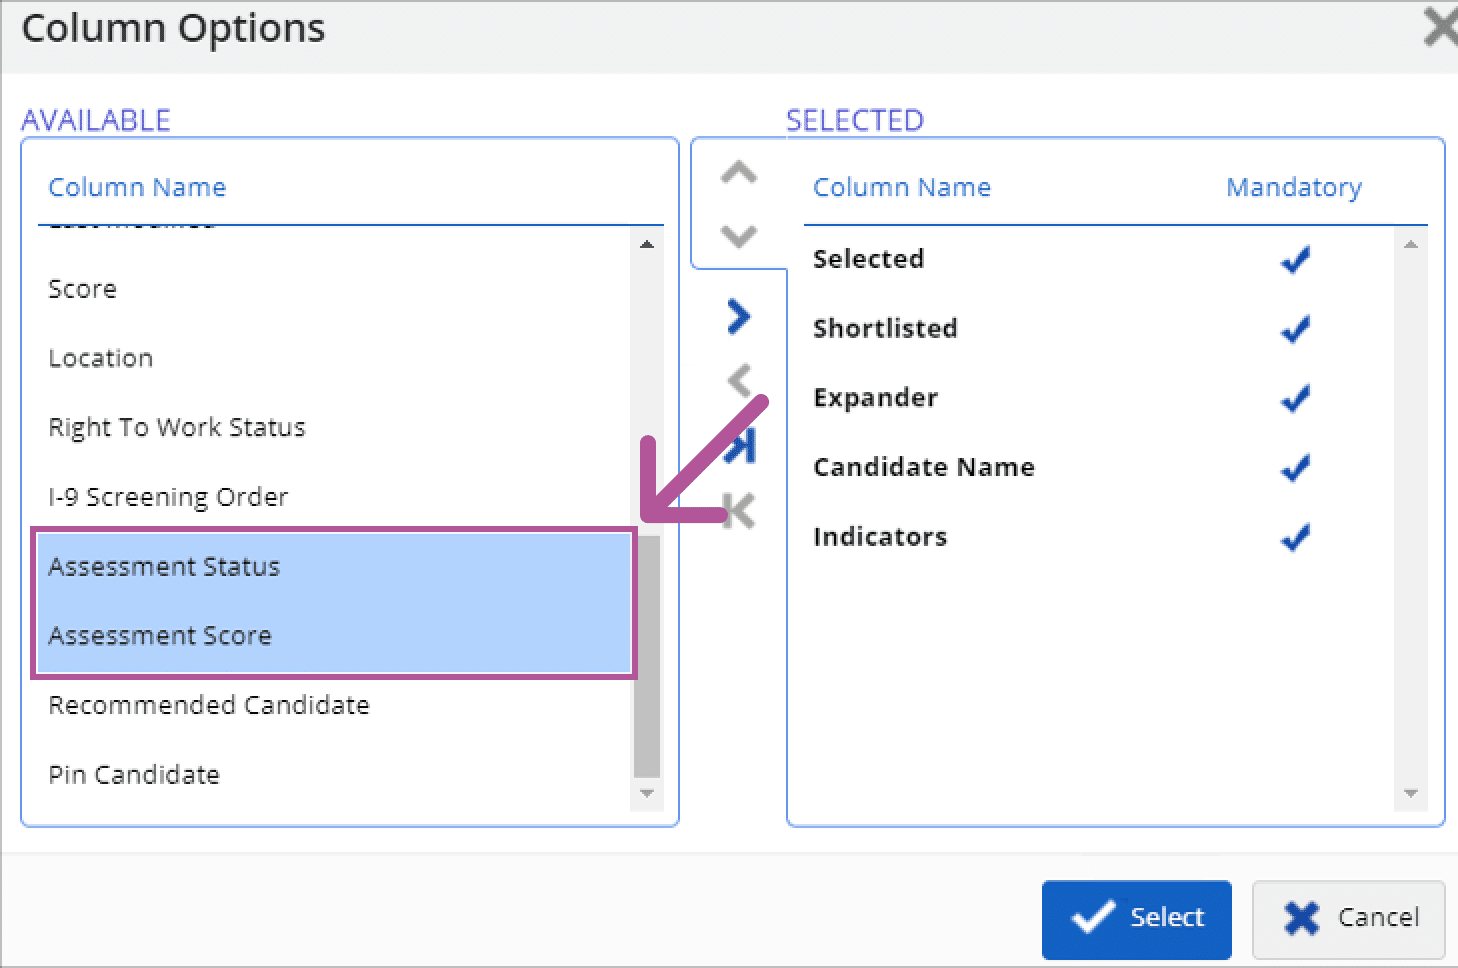
- Select Assessment Status, hold down the Shift key, and select Assessment Score to select both sections.
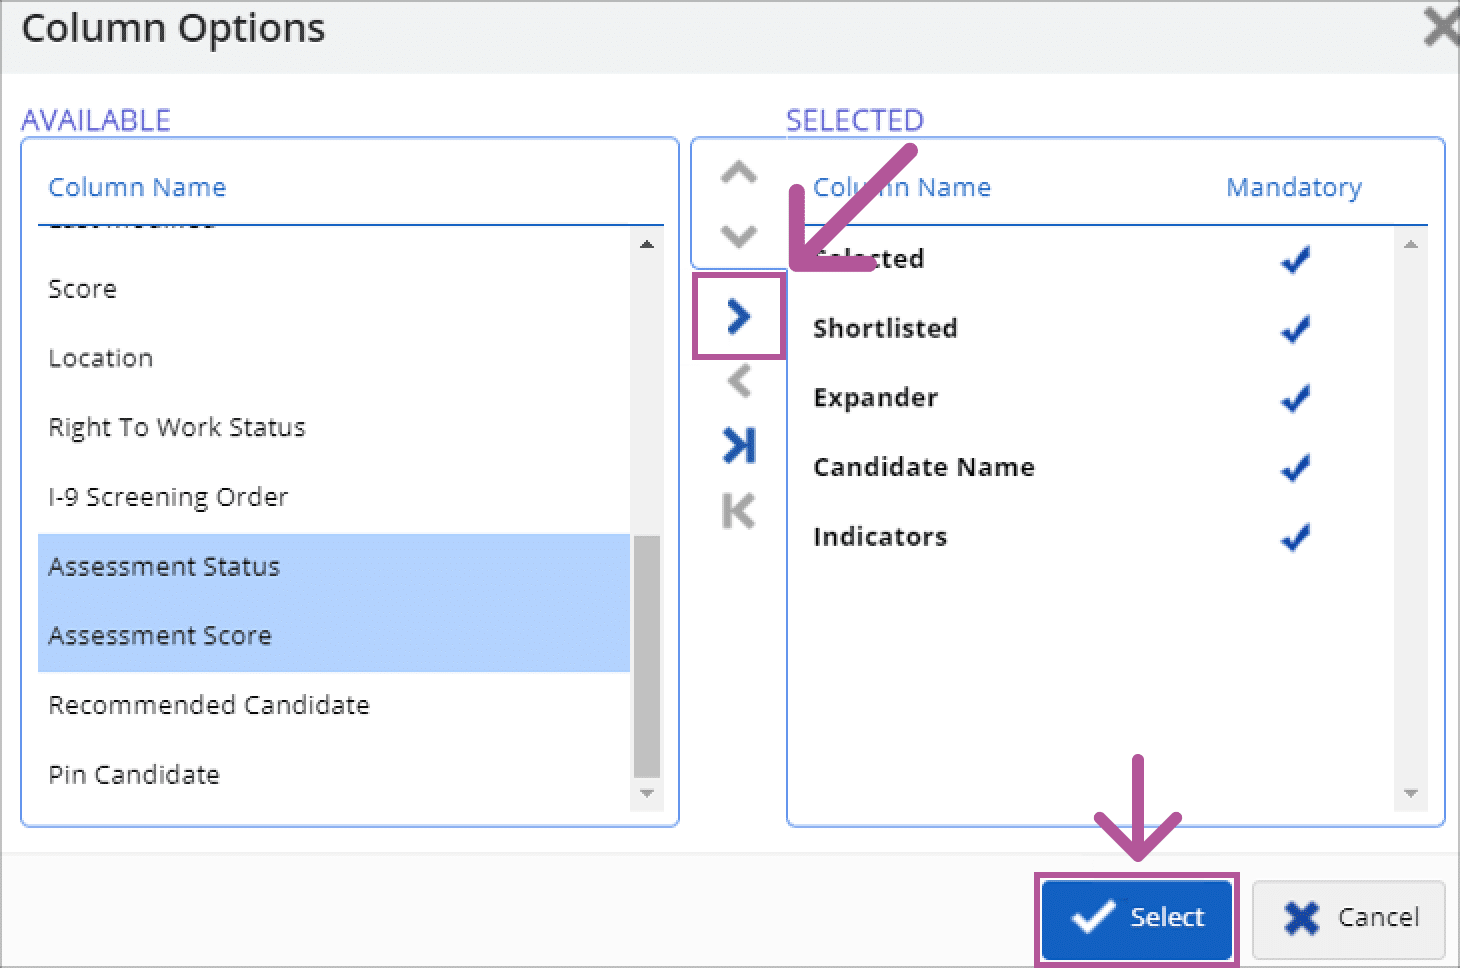
- Click > from the middle of the screen (to add them).
- Click Select once you’re done.
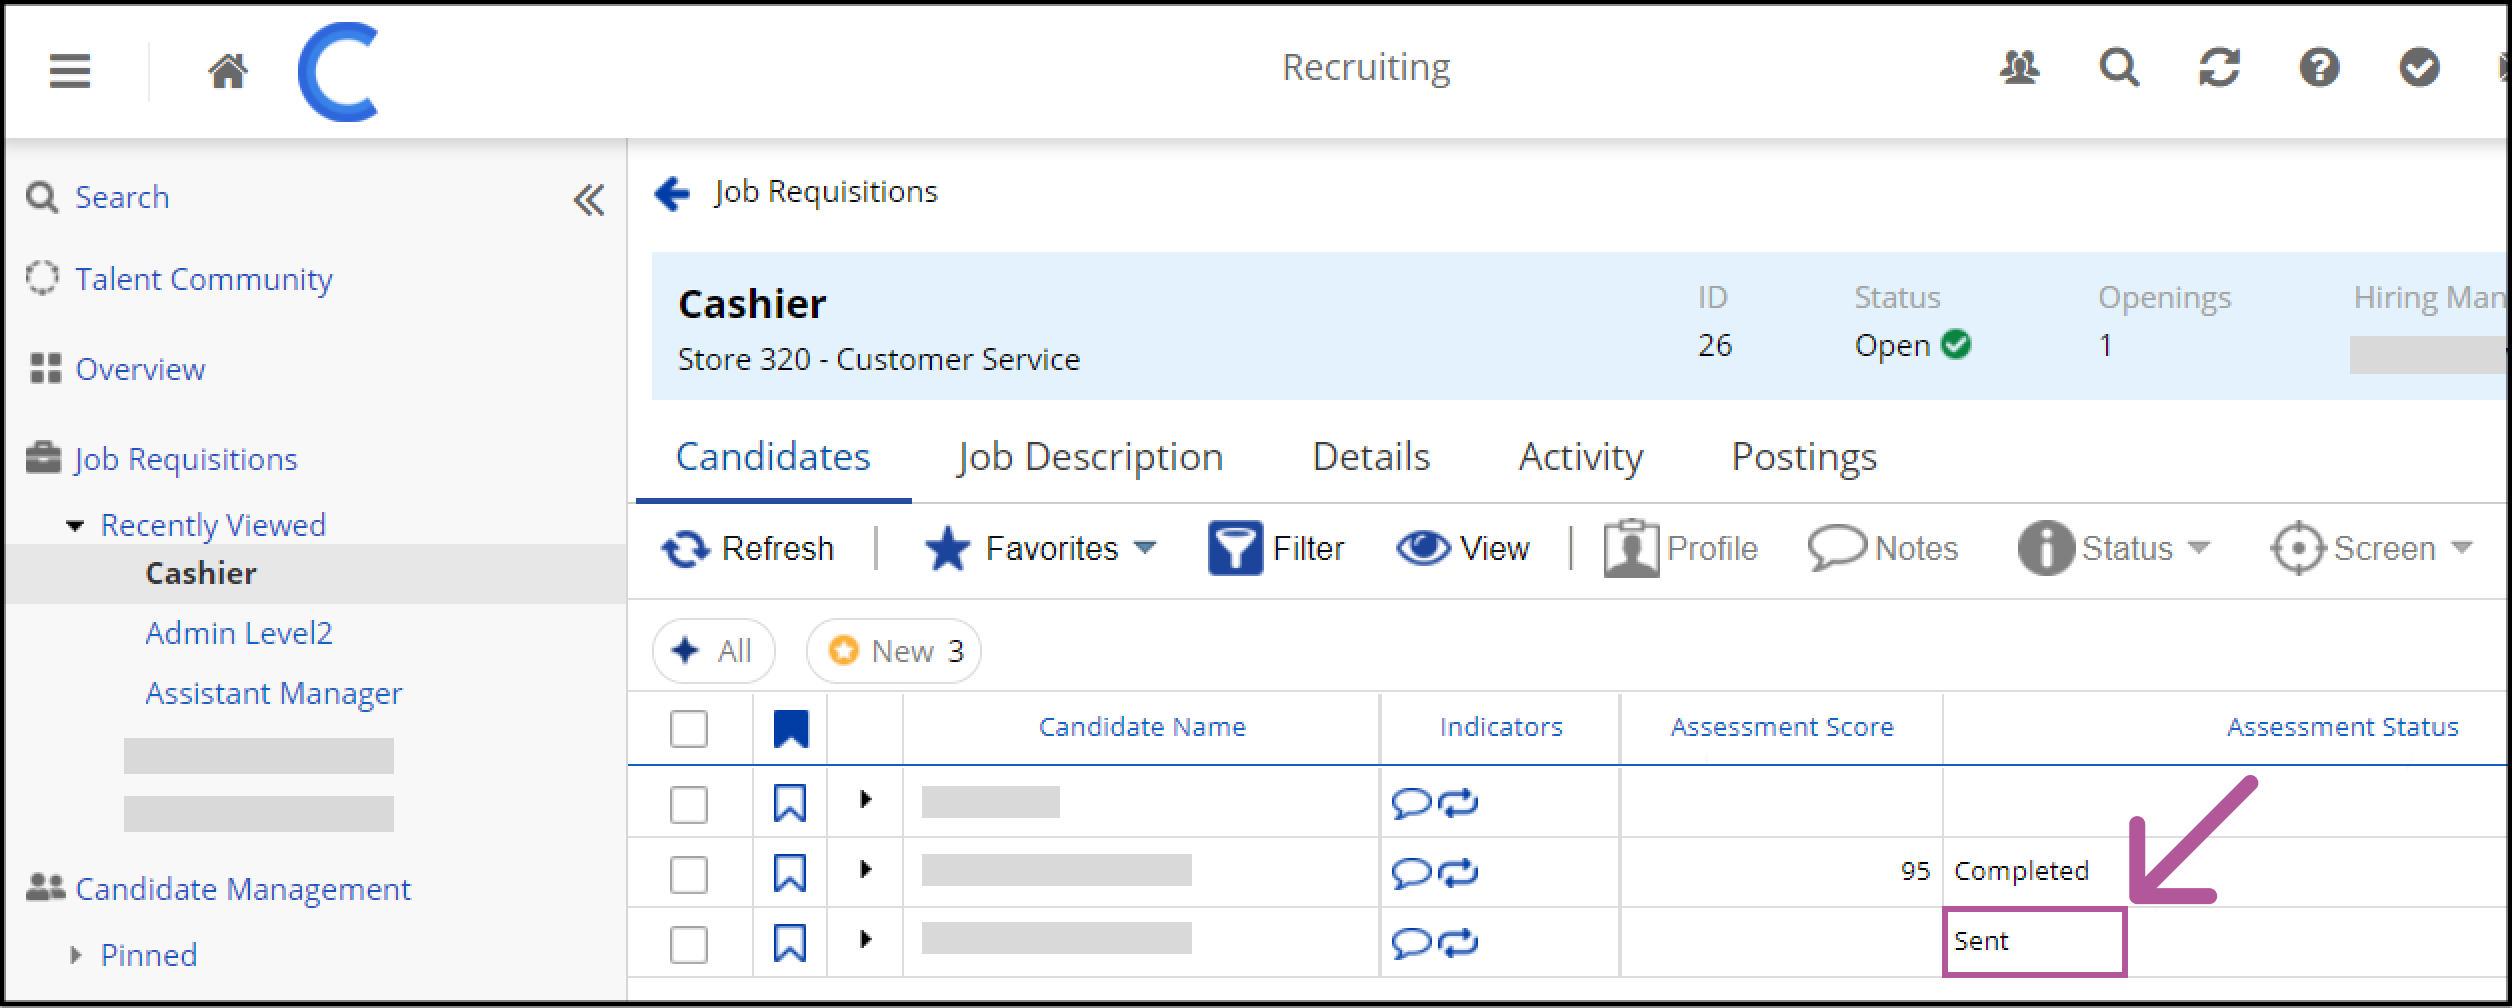
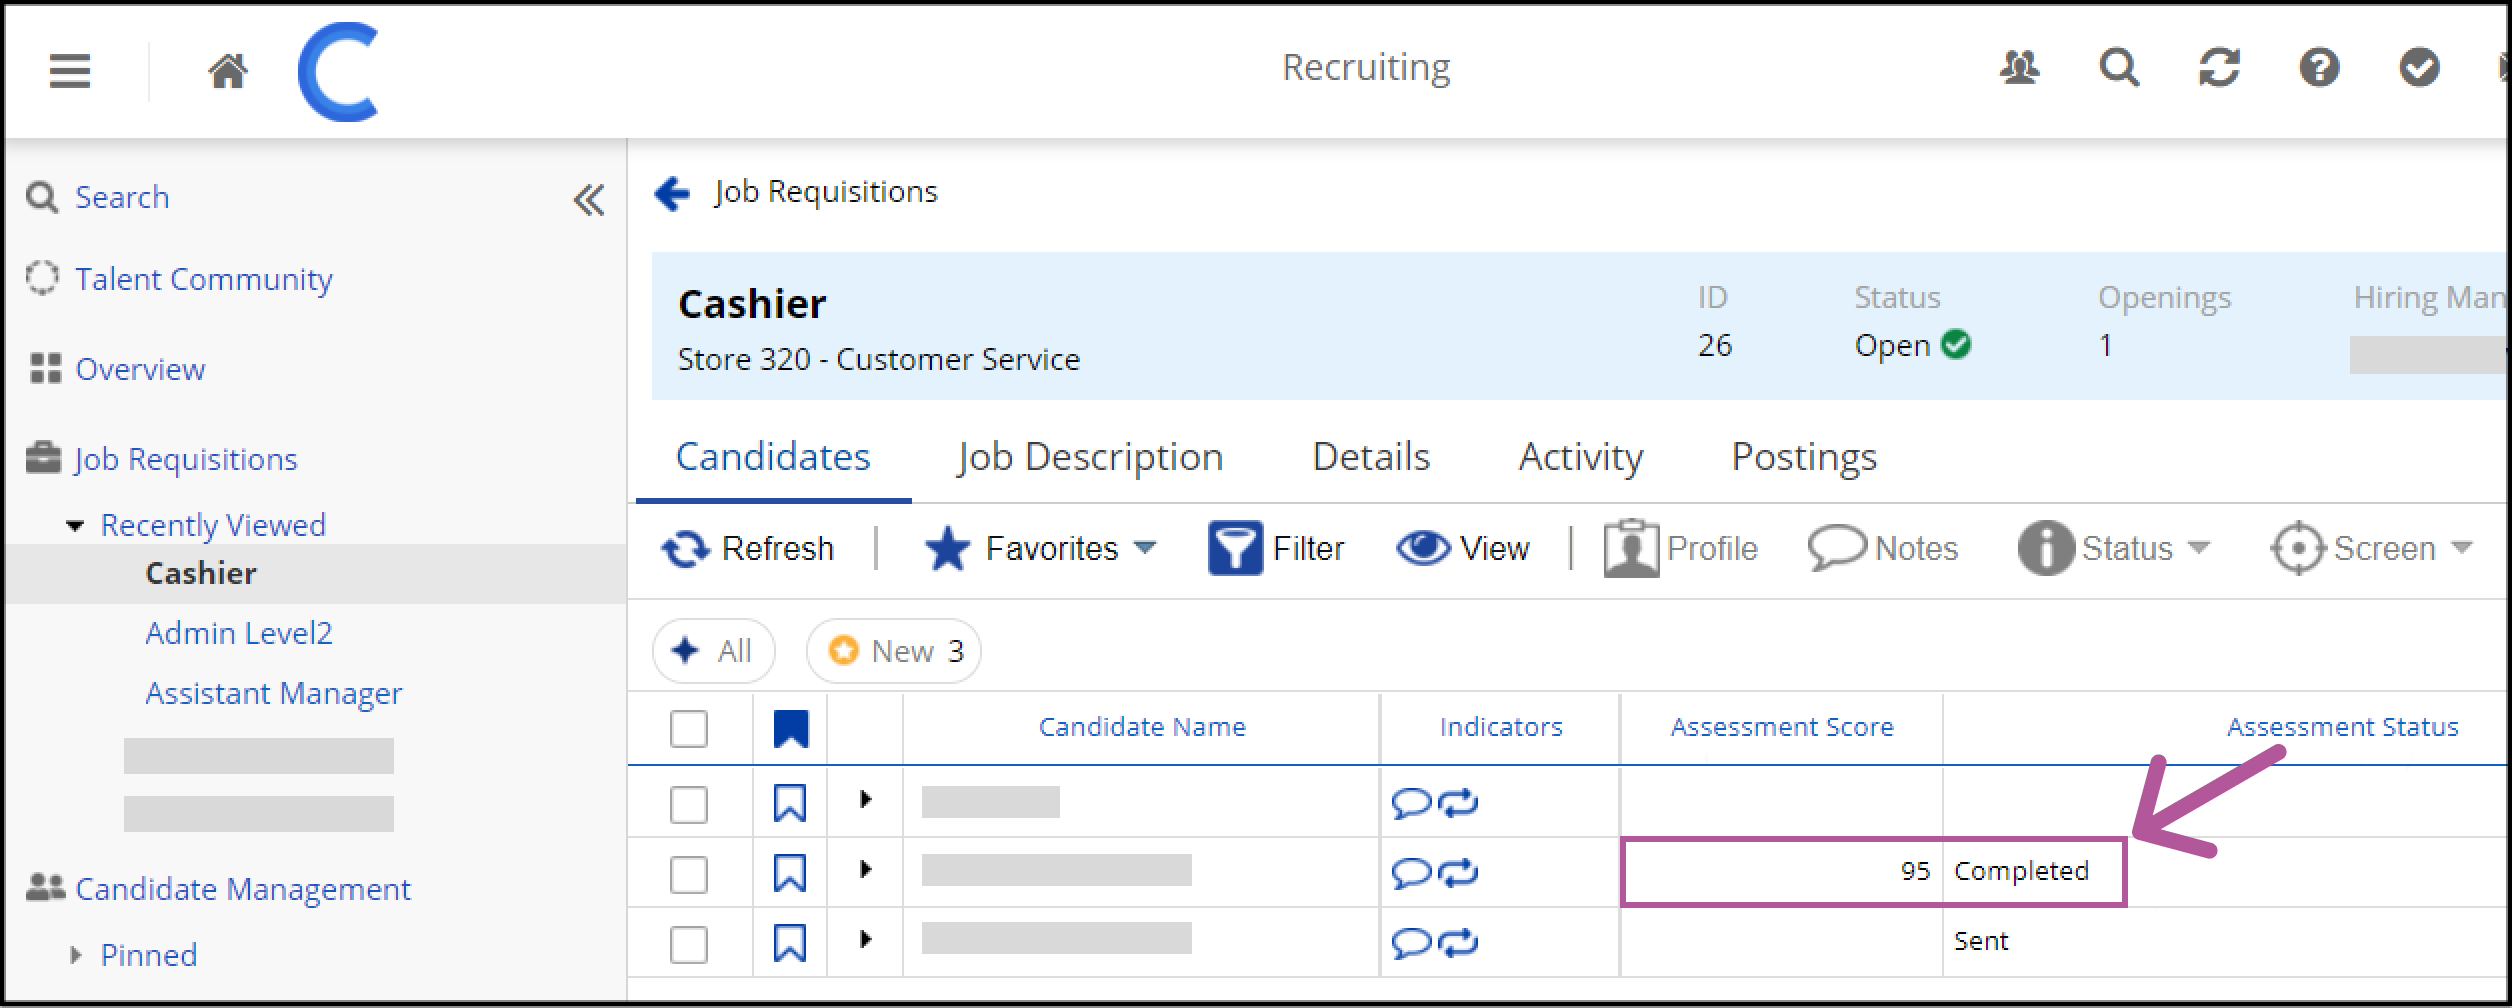
When an assessment invitation email has been sent, the Assessment Status column for the candidate is updated to Sent in the list of candidates for that job or is displayed in the candidate’s record.
An error status is displayed if the assessment fails to be sent to the candidate. If you’re not able to determine the cause of the error, it is recommended that you log a support ticket with Dayforce and the HighMatch Support team at support@highmatch.com.
After the candidate completes the assessment, the Assessment Status column is updated to Completed and the score, if any, is displayed in the Assessment Score column in the list of candidates for that job or in the candidate’s record.
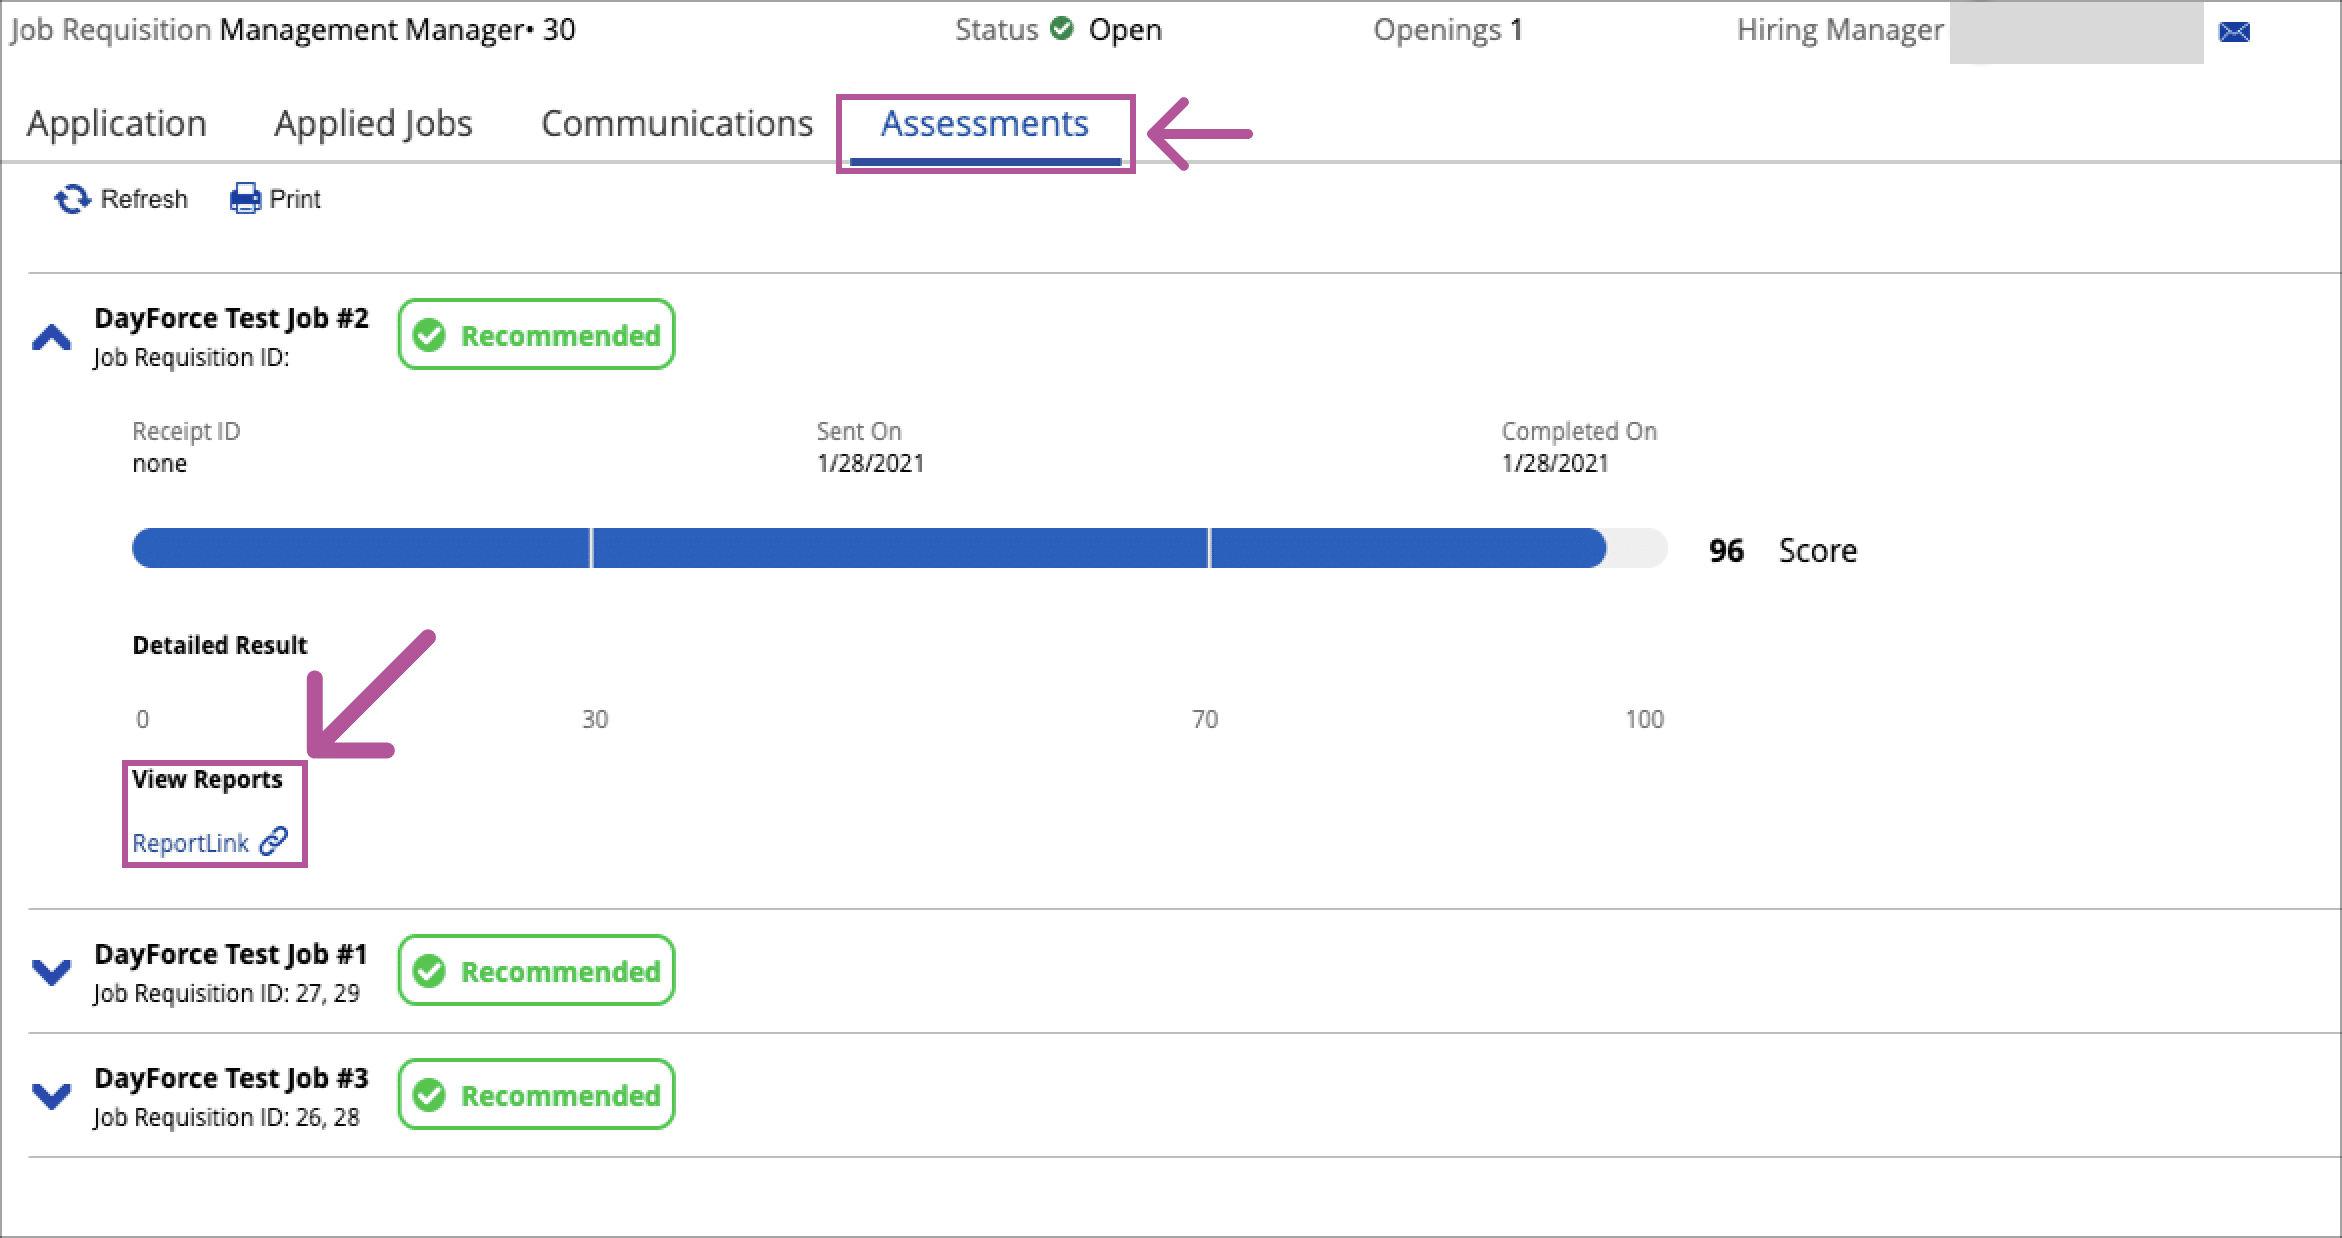
To view the assessment results including the score, and a link to the detailed HighMatch assessment report, go to the candidate’s record > Assessments tab > click the Report Link under the View Reports section. This will take you to the HighMatch assessment report in a new tab.
The process is now complete! Please reach out to HighMatch’s Success team at support@highmatch.com if you have any questions or feedback regarding the HighMatch integration, assessments and assessment reports.